

A jar of fresh lemon balm looks fine on the counter for about two days before it wilts, browns, and heads for the compost bin. If you want that bright, lemony flavor in your teacup come January, you need to dry it, and you need to do it in a way that suits this particular herb. Lemon balm doesn’t behave like rosemary or thyme once it’s cut. It holds more water in its leaves, which means the wrong drying method can leave you with mold instead of tea.
This guide walks through why lemon balm needs its own approach, when to harvest it, and four drying methods you can use depending on the tools you have at home. It’s written for home gardeners and herbal tea drinkers who’ve got a lemon balm plant (or a fresh bunch from the farmers market) and want it to last through the off-season.
Quick Answer
To dry lemon balm for tea, harvest the leaves in mid-morning, rinse and pat them dry, then use a dehydrator at 95–115°F, hang them in a paper bag, or microwave them in short bursts. Lemon balm is a tender, high-moisture herb, so fast drying methods work better than slow air-drying alone. Store the dried leaves whole in an airtight jar away from light.
Key Facts
- Dehydrator temperature: 95°F to 115°F (up to 125°F in humid climates)
- Dehydrator drying time: 1 to 4 hours
- Air-drying (paper bag) time: 5 to 10 days
- Microwave drying time: 2 to 6 minutes in 30-second bursts
- Shelf life once properly dried and stored: 6 to 12 months
Why Lemon Balm Dries Differently Than Other Herbs
Lemon balm (Melissa officinalis) is a member of the mint family, and like most mints, its leaves are thin and packed with water. That’s great for fresh use. It’s a problem when you’re trying to preserve it.
The Moisture Problem
Food preservation researchers at the University of Georgia’s National Center for Home Food Preservation group herbs into two categories: sturdy herbs like rosemary, sage, and thyme that air-dry well, and tender-leaf herbs like basil, oregano, and lemon balm, which hold more moisture and will mold if they aren’t dried quickly. That’s the core reason a generic “hang it in a bunch for two weeks” guide doesn’t work well here. Left in open air too long, tender leaves stay damp on the inside even while the outside looks crisp, and mold sets in before the center ever dries out.
The Scent Problem
The second issue is heat. Lemon balm’s signature scent comes from volatile compounds, mainly citral, sitting in tiny oil glands on the leaf surface. High heat drives those compounds off before the water even finishes evaporating. Dry lemon balm too hot or too fast, and you’ll end up with leaves that look dry but smell like faint hay instead of lemon. Every method below is built around keeping the temperature low while still drying fast enough to outrun mold.
When to Harvest Lemon Balm for Drying
Timing matters as much as method. Extension horticulturists generally recommend cutting herbs for drying in the mid-morning, once the dew has evaporated but before the midday sun has had a chance to burn off the essential oils. Harvest lemon balm just before it flowers, when leaf oils are most concentrated; once the plant blooms, the leaves turn slightly bitter.
Use clean scissors or garden snips, and cut stems a few inches above the base so the plant can regrow. Rinse the cut stems under cool water to remove dirt and insects, then shake off the excess moisture and pat the leaves dry between two clean kitchen towels. Skipping this step leaves surface water on the leaves, which adds drying time and raises the odds of mold.
Don’t have your own plant? A bunch from a farmers market or grocery store works the same way. Look for stems with firm, deep-green leaves and no yellowing or dark spots, since wilted leaves are already partway to spoiling and won’t dry cleanly no matter which method you use. Once you get it home, treat it exactly like a fresh harvest: rinse, pat dry, and move straight into one of the drying methods below rather than letting it sit in the refrigerator for days first.
4 Ways to Dry Lemon Balm for Tea
You don’t need special equipment to dry lemon balm well, but the method you pick should match how humid your kitchen is and how much lemon balm you’re working with. Here’s how the four common options stack up.
| Method | Time Needed | Best For | Flavor Retention |
|---|---|---|---|
| Air-drying (paper bag) | 5–10 days | Small batches, no equipment | Good |
| Food dehydrator | 1–4 hours | Larger harvests, humid climates | Best |
| Oven | 2–4 hours | When you have no dehydrator | Fair |
| Microwave | 2–6 minutes | Very small, quick batches | Good |
Air-Drying (Paper Bag Method)
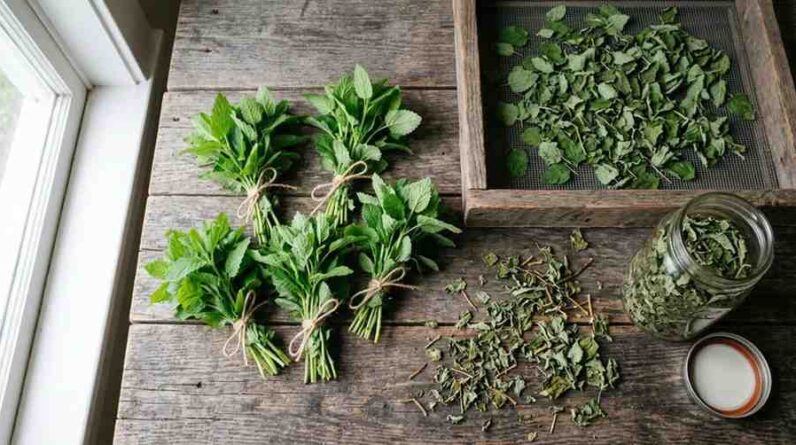
This is the low-tech option, and it works for lemon balm as long as you adapt it for a tender-leaf herb. Instead of hanging the stems out in the open, tie 4–6 stems into a loose bundle and slide the leafy ends into a paper bag. Punch a few holes in the sides for airflow, then tie the bag shut around the stems and hang it upside down somewhere dark, dry, and well-ventilated.
The bag catches falling leaf bits and shields the herb from dust and light, both of which degrade flavor. Expect this method to take five to ten days depending on humidity. Check the bag every couple of days; if you smell anything musty, the batch is molding and should be tossed.
Food Dehydrator
A dehydrator is the most reliable option if you’re drying more than a handful of stems, and it’s the method extension services recommend most often for tender, high-moisture herbs. Rinse and pat the leaves dry, then arrange them in a single layer on the trays so they aren’t touching.
Preheat the dehydrator, then set it to 95°F-115°F, or as high as 125°F if you’re in a particularly humid climate. Drying usually takes one to four hours; check every 30 minutes after the first hour. Lower and slower beats hotter and faster here, since it protects the citral that gives lemon balm its scent.
Oven Drying
Without a dehydrator, your oven can work in a pinch, though it’s the least precise method on this list. Set the oven to its lowest possible temperature, ideally not above 180°F, and prop the door open a few inches so moisture can escape instead of steaming the leaves.
Spread the lemon balm in a single layer on a baking sheet lined with parchment. Check every 30 minutes; most batches finish in two to four hours. Because home ovens rarely hold a steady low temperature, keep a close eye on the first batch you try so you can dial in timing for your specific oven.
Microwave Drying
For a single day’s harvest, the microwave is the fastest route. Lay a single layer of leaves between two sheets of plain paper towel, never more than one to two cups at a time. Microwave in 30-second bursts on high, checking and rotating the leaves between each round.
Most small batches finish in two to six minutes total, depending on your microwave’s wattage. This method works well for topping off a nearly-empty jar, but it’s harder to control for larger harvests since leaves near the edges of the towel dry faster than those in the center.
How to Tell When Lemon Balm Is Fully Dry
Regardless of the method, lemon balm is ready for storage when the leaves crumble easily between your fingers and the stems snap cleanly rather than bend. If a stem still folds without breaking, there’s moisture left inside, and the batch needs more time.
Resist the urge to store leaves the moment they look dry on the outside. Pull a few from different spots on the tray or bag and test them; uneven drying is common, especially with air-drying, where leaves closer to the bag’s opening dry faster than those tucked inside.
How to Store Dried Lemon Balm for Tea
Once your lemon balm passes the crumble test, let it cool completely before sealing it away. Storing warm herbs traps residual moisture inside the container, which invites mold even after a successful dry.
Keep the leaves whole rather than crumbling them right away; crumbled herb has more surface area exposed to air, so it loses potency faster. Transfer the whole dried leaves into an airtight glass jar, and store it in a cool, dark cabinet rather than a spot near the stove or a sunny windowsill. Heat, light, and air are the three things that break down the oils responsible for both flavor and scent.
Stored this way, dried lemon balm typically holds good flavor for six to twelve months. It won’t spoil in a way that makes it unsafe, but it will gradually turn bland, so smell-test older jars before brewing and replace anything that’s lost its lemon scent.
Common Mistakes That Ruin Dried Lemon Balm
A few habits account for most of the disappointing batches home dryers end up with:
- Drying in direct sunlight. It feels efficient, but UV exposure bleaches color and breaks down the essential oils that carry the lemon scent.
- Crowding the trays or bag. Leaves that touch each other trap moisture between them and dry unevenly, leaving damp pockets that mold.
- Skipping the pre-dry rinse-and-pat step. Surface moisture from washing adds hours to drying time and raises mold risk.
- Storing before it’s fully dry. Even 90% dry is too soon; any residual moisture in a sealed jar becomes a breeding ground for mold within days.
- Crumbling the leaves before storage. It seems like it saves a step later, but it shortens shelf life noticeably.
A Quick Note on Freezing Instead of Drying
Drying isn’t the only way to preserve lemon balm, and it’s worth knowing the alternative even if you plan to dry most of your harvest. Freezing keeps more of the fresh, bright flavor than drying does, though it changes the leaf texture and isn’t practical for steeping loose in a teapot the same way dried leaves are.
To freeze lemon balm, chop the washed leaves and pack them into an ice cube tray with a little water, then transfer the frozen cubes to a labeled freezer bag once solid. Drop a cube directly into hot water for a quick infusion. It’s a useful backup for cooking or cold drinks, but for a pantry-stable jar of tea leaves you can scoop from all winter, drying is still the better choice.
How to Brew Tea From Dried Lemon Balm
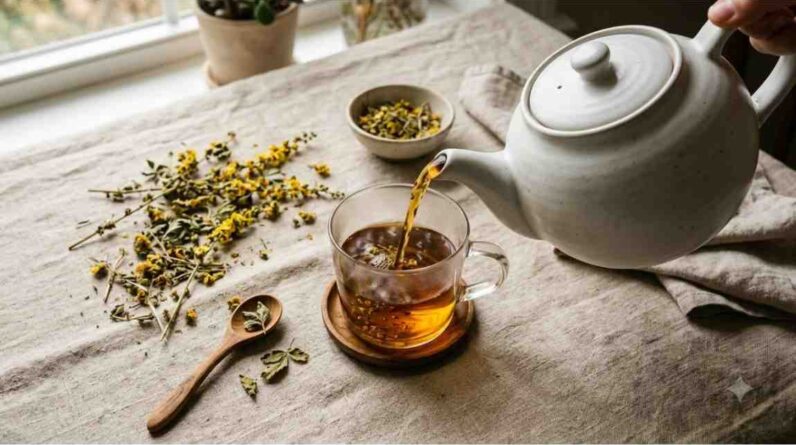
Once you’ve got a jar of properly dried lemon balm, brewing is simple. Use about one to two teaspoons of dried leaves per cup of water just below boiling, around 200°F, since lemon balm’s delicate oils can turn bitter if scalded. Steep covered for five to ten minutes, then strain.
Dried herbs are more concentrated than fresh ones, so if a recipe calls for a tablespoon of fresh lemon balm, start with about a teaspoon of the dried version and adjust to taste. For more on the herb itself, including how it’s traditionally used beyond tea, see our guide to lemon balm herb benefits and uses.
Dried lemon balm also blends well with other mild, dried herbs if you want to build your own tea mixes. A pinch alongside dried chamomile flowers or dried peppermint leaves rounds out the flavor without overpowering it. Keep any blend in its own labeled jar rather than mixing it into your main lemon balm stash, since blended batches are harder to portion consistently once they’re combined.
Frequently Asked Questions
It depends on the method. A dehydrator or oven usually takes one to four hours, air-drying in a paper bag takes five to ten days, and microwave drying takes just a few minutes for a small batch.
Yes. Lay a single layer of leaves between paper towels and microwave in 30-second bursts, checking between each one. Most small batches are done in two to six minutes.
Some scent loss is normal, since the volatile oils that carry the lemon smell break down with heat and time. Drying at a low temperature and storing away from light and heat keeps the most scent intact.
Let the dried leaves cool completely, then keep them whole in an airtight glass jar in a cool, dark cabinet. Crumble only what you need right before brewing, and expect good flavor for six to twelve months.
A dehydrator is better for lemon balm because it’s a tender, high-moisture herb that molds if it dries too slowly. Air-drying works for small batches in a dry climate, but a dehydrator gives more consistent results, especially anywhere humid.
Drying lemon balm at home comes down to matching your method to how much you’re working with and how humid your kitchen runs. Once you’ve got a jar of properly dried leaves stored away from heat and light, you’ve got fragrant tea on hand for months, not days. If you’re building out a wider tea cabinet, our guide to making chamomile tea at home covers a similarly gentle drying approach for another delicate herb, and our roundup of herbal remedies for bloating is worth a look if digestive comfort is part of why you’re drinking lemon balm tea in the first place.
Disclaimer: This article is for educational purposes only and is not intended as medical advice. Always consult a qualified healthcare professional before using medicinal herbs, especially if you are pregnant, nursing, taking medications, or have a medical condition. Read our full Medical Disclaimer.
References
- National Center for Home Food Preservation, University of Georgia, “How to Dry: Herbs” → https://nchfp.uga.edu/how/dry/recipes/herbs
- Penn State Extension, “Let’s Preserve: Drying Herbs” → https://extension.psu.edu/lets-preserve-drying-herbs
- Oregon State University Extension Service, “Drying Herbs” → https://extension.oregonstate.edu/food/preservation/drying-herbs
- Cleveland Clinic, “6 Benefits of Lemon Balm” → https://health.clevelandclinic.org/lemon-balm-benefits
- WebMD, “Lemon Balm: Uses, Side Effects, Interactions, Pictures, Warnings & Dosing” → https://www.webmd.com/vitamins/ai/ingredientmono-437/lemon-balm

Researches medicinal plants, herbal wellness, and sustainable gardening practices. Through Herbal Daily Care, she helps readers discover the benefits of growing and using herbs at home.